
Last Updated: October 23, 2026
Quick Summary
To stage property for photos, declutter and depersonalize the space, deep clean all surfaces, arrange furniture to show room flow, and optimize lighting with natural light and warm artificial bulbs. This preparation transforms how buyers perceive the property in listing photos and helps homes sell faster at higher prices.
- Remove family photos, personal collections, and hobby items so buyers can imagine themselves in the space.
- Clear kitchen and bathroom countertops entirely, hiding appliances and personal care items in cabinets.
- Arrange furniture slightly away from walls to create conversation areas and demonstrate room depth and scale.
- Open all curtains and blinds fully during the shoot and use warm-bulb lighting to maximize natural and artificial light.
- For vacant properties, bring in minimal neutral furniture and décor to show scale without overcrowding the space.
Table of Contents
- How to Stage Property for Photos: The Complete Workflow
- Decluttering and Depersonalizing: The Foundation
- Deep Cleaning and Surface Preparation
- Real Estate Photography Checklist: Room-by-Room Staging
- Staging an Empty House for Photos
- Furniture Arrangement and Room Flow
- Lighting, Camera Angles, and Photography Preparation
- Virtual Staging for Real Estate Photos: When and How
- Frequently Asked Questions
How to Stage Property for Photos: The Complete Workflow
Staging a property for photos transforms how buyers perceive a space. The difference between amateur snapshots and professional listing photos comes down to preparation, not equipment.
At MarkChamberlin, we’ve worked with real estate agents across the region to capture properties that sell faster and at higher prices. Staging is the foundation; without it, even professional photography struggles to overcome clutter, poor lighting, and unfocused layouts.
This guide walks you through every step of staging property for photos, from decluttering and deep cleaning through furniture arrangement, lighting, and virtual staging.
Decluttering and Depersonalizing: The Foundation
Removing visual clutter is where staging begins. A cluttered home competes for attention, and buyers start imagining all the work they’d need to do to make it their own. Decluttering removes that friction.
The goal isn’t emptiness but clarity: buyers should see the room’s potential, not your personal life. Remove family photos, personal collections, quirky décor, and anything that makes the space feel like someone else’s home.
Remove Personal Items and Family Photos
Personal photos on walls, shelves, and nightstands should go entirely. Family portraits, children’s artwork, and vacation photos pull focus away from the property; buyers need to imagine themselves in the space, not wonder about your family.
Also remove items reflecting individual taste: religious items, hobby collections, awards, trophies, and personalized décor. Vintage band posters, sports memorabilia, and niche hobby equipment all tell a story that isn’t about the home’s features.
Clear bookshelves partially: remove at least 50% of what’s there and arrange the remaining books by color or size for a curated appearance.
Clear Kitchen Countertops and Hide Daily Items
Kitchen countertops are prime real estate in listing photos. Clear everything except one or two decorative items, perhaps a bowl of fresh fruit or a small plant.
Hide the dish rack, sponges, soap dispensers, utensil holders, coffee makers, toasters, and small appliances in cabinets. A clean, empty counter reads as spacious and high-end.
The same applies to bathroom counters: remove soap dispensers, toothbrush holders, makeup, medications, and personal care items. A single hand towel and perhaps a small decorative item are enough.
Deep Cleaning and Surface Preparation
Clean surfaces are non-negotiable. Professional photos expose dust, fingerprints, streaks, and grime the human eye overlooks; what looks acceptably clean in daily life looks dingy in photos.
Deep clean every surface the camera will see: baseboards, light switches, door frames, cabinet fronts, ceiling fans, light fixtures, and crown molding.
Floors should be spotless: vacuum or sweep thoroughly, then mop hard floors, and consider professional carpet cleaning if carpet looks worn or stained.
Clean mirrors and glass thoroughly with a glass cleaner and microfiber cloth; streaks and fingerprints are highly visible in photos.
Real Estate Photography Checklist: Room-by-Room Staging
Work room by room, applying the same principles: declutter, deep clean, arrange for visual flow, and optimize lighting.
Living Room and Bedrooms
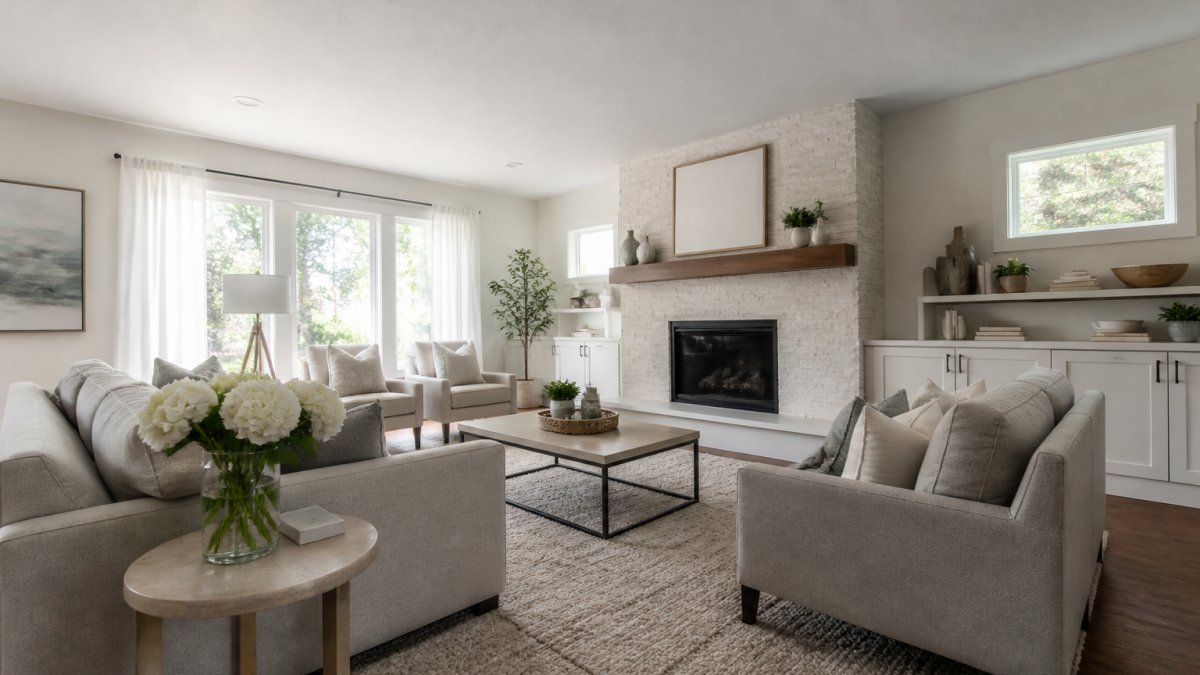
Living rooms should feel spacious and inviting. Arrange furniture to show the room’s flow and scale, avoiding pushing everything against walls; create a conversation area instead. Add a few neutral accents: a throw pillow, a small plant, or framed art.
Bedrooms need minimal staging: a neatly made bed with neutral bedding is essential. Remove furniture if the room feels cramped; a single piece of art above the bed and perhaps a small plant are enough. Avoid personal items entirely.
Ensure closets are visibly empty and organized; buyers want to see storage space, and a packed closet signals the opposite.
Kitchen and Bathrooms
Kitchens photograph best when open and clean. Clear all countertops, wipe cabinet fronts free of fingerprints, and open a few cabinet doors slightly to suggest storage without looking unfinished.
An empty, clean sink is ideal; if you must show a faucet, ensure it’s spotless and shiny. Keep cabinet doors closed so no pipes or cleaning supplies are visible.
Bathrooms should be pristine: clean the toilet, tub, and shower thoroughly, keep the toilet seat down, and remove all personal items.
Bathroom counters should be completely clear except for a single hand towel. Even a soap dispenser can look cluttered in photos.
Staging an Empty House for Photos
Vacant properties present a different challenge: an empty house can feel cold, so you must add enough furniture and décor to make it livable without overcrowding it.
For an empty house, bring in minimal, neutral furniture: a sofa, a few accent chairs, and a dining table for main living areas, plus a bed in each bedroom.
Add a few neutral décor items: throw pillows, plants, and simple artwork. Keep colors muted; grays, whites, beiges, and soft greens work universally.
Lighting is even more critical in vacant spaces.
Furniture Arrangement and Room Flow
Furniture arrangement determines whether a room photographs as spacious or cramped. Arrange pieces to create clear sightlines and demonstrate how the space functions.
Avoid pushing all furniture against walls; pull pieces slightly into the room to create conversation areas and show depth.
Remove excess furniture.
In bedrooms, keep furniture minimal: a bed, a single nightstand, and perhaps a dresser. Remove extra chairs, benches, or storage pieces that make the room feel cluttered.
Hallways should be completely clear. Remove console tables, coat racks, or wall décor that narrows the passage; wide, clear hallways photograph as inviting.
Lighting, Camera Angles, and Photography Preparation
Lighting makes or breaks real estate photography; poor lighting makes even a beautiful space look dull. Professional photos rely on controlling both natural and artificial light.
Maximize Natural Light and Adjust Artificial Lighting
Open all curtains and blinds fully during the shoot. Natural light is flattering, free, and makes spaces feel open and airy, so ensure every window is spotless.
Overcast days are actually ideal, since diffuse light avoids harsh shadows; sunny days can make spaces look choppy. Either way, maximize whatever natural light is available.
Artificial lighting should be minimal and strategic.
Remove visible light fixtures from view if possible, and clean ceiling fan blades thoroughly; exposed bulbs or outdated fixtures can date a property in photos.
Position Focal Points and Compose for Camera Angles
Every room should have a clear focal point: a fireplace, large window, or piece of art in a living room, the bed in a bedroom.
Wide-angle lenses are standard in real estate photography because they show more of the room. This means corners and edges will be visible.
Position yourself in doorways when considering camera angles. The camera will likely be placed there, shooting into the room. Arrange furniture so sightlines are clear from that vantage point.
Avoid clutter near doorways. The first thing the camera sees entering a room sets the tone for how the entire space is perceived.
Virtual Staging for Real Estate Photos: When and How
Virtual staging uses photo editing to add furniture, décor, or even remove items from images after the photo is taken.
Virtual staging works best for vacant properties where you want to show how furniture could be arranged.
The key ethical consideration: virtual staging should clearly represent what’s possible, not what’s guaranteed. If you use virtual staging, disclose it.
Professional virtual staging is expensive and time-consuming. For most properties, physical staging delivers better results because it’s real.
If you choose virtual staging, use it sparingly.
Staging property for photos is fundamentally about clarity and possibility. Ready to capture your property in its best light? Contact MarkChamberlin for professional property photography to discuss how we can showcase your listing with images that sell.
| Staging Task | Best Timing | Impact on Photos |
|---|---|---|
| Declutter and depersonalize | 1-2 weeks before shoot | High, removes visual competition |
| Deep clean all surfaces | 2-3 days before shoot | High, eliminates dust and streaks |
| Arrange furniture | 3-5 days before shoot | High, demonstrates room flow |
| Stage décor (flowers, plants, art) | 1-2 days before shoot | Medium, adds warmth and interest |
| Final touch-up clean | Day of shoot | High, catches last-minute dust and marks |
| Optimize lighting | Morning of shoot | High, maximizes natural and artificial light |
Real estate photography checklist success depends on understanding that the camera sees differently than the human eye.
According to the National Association of Realtors’ insights on property presentation, homes that are staged and professionally photographed spend less time on the market and sell for higher prices.
For real estate agents working with vacant properties, the Real Estate Board’s guidelines on vacant property marketing recommends minimal staging that shows potential without overwhelming the space.
Frequently Asked Questions
What should you remove from a room before taking property photos?
Remove family photos, personal memorabilia, clutter, and items on countertops and shelves. Hide sponges, dish soap, and magnets from the refrigerator. Clear bathroom counters of toiletries and towel racks. Depersonalizing helps buyers envision themselves in the space. For staging an empty house for photos, this step is even more critical, every visible item should serve the staging narrative, not distract from it.
How long does it take to stage a property for photos?
Decluttering and deep cleaning typically take 2-4 days for a standard home, depending on size and current condition. Furniture arrangement and final touches take 1-2 days. A real estate photography checklist helps you stay organized and ensures nothing is missed. Plan to complete all staging at least one day before the photo shoot to allow time for any last-minute adjustments or touch-ups.
Can you virtually stage a property for listing photos?
Yes. Virtual staging for real estate photos uses image editing to add furniture, decor, or landscaping to photos of empty rooms. It’s cost-effective for vacant properties and allows you to show multiple design options. However, disclose virtual staging clearly to buyers, misrepresenting edited images can damage trust and credibility. Use virtual staging to enhance appeal, not to deceive about the property’s true condition or features.
How do you make a small room look larger in listing photos?
Use wide-angle camera lenses to expand the sense of space. Arrange furniture to maximize room flow and avoid blocking focal points. Declutter aggressively and use neutral decor. Maximize natural light and add mirrors to reflect light and create depth. Position the camera in a corner or doorway to capture more of the room. These home staging tips for photos work together to make compact spaces feel inviting and spacious.
What is the best time of day to photograph property interiors?
Shoot during midday or early afternoon when natural light is brightest and most even. Avoid harsh shadows from low-angle morning or evening sun. If the property has excellent natural light, you have more flexibility. Cloudy days provide soft, diffused light that flatters interiors. Coordinate with your photographer about the ideal timing based on the property’s window orientation and sun exposure throughout the day.
Should you stage a property differently for different buyer types?
Yes. Family homes benefit from warm, inviting decor and spacious, open layouts. Luxury properties should emphasize high-end finishes and sophisticated design. Investment properties or vacant homes may rely more on virtual staging or minimal decor that highlights structural features. Understand your target buyer profile and stage accordingly. Professional real estate photography combined with strategic staging communicates the property’s best features to the right audience.
What’s the difference between staging a furnished home versus an empty house for photos?
Furnished homes require decluttering, depersonalizing, and strategic arrangement to show room flow and scale. Staging an empty house for photos demands more intentional furniture placement or virtual staging to help buyers visualize the space. Empty properties benefit from strategic lighting and camera angles that emphasize room dimensions. Both approaches aim to highlight property features and create an inviting, spacious impression in listing photos.
